


Views: 0 Author: Site Editor Publish Time: 2026-09-29 Origin: Site


When you set out to install heavy structural elements, finding the exact drill hole size for your fastener dictates project success. Professionals often search for a definitive rule to avoid catastrophic pull-outs. We know how frustrating vague installation guidelines can feel. Unlike some basic fastening systems, concrete expansion fasteners require precise, specific tolerances. They must achieve their published load capacities safely. Failure to match your drill bit size, fastener diameter, and base material conditions results in compromised structural integrity. This guide will clarify the exact sizing rules you must follow. You will learn the mechanics behind the 1:1 installation ratio. We will cover depth requirements, proper cleaning steps, and critical installation parameters. By following these guidelines, you ensure a secure and perfect fit every time.
The Golden Rule: The diameter of the drill bit must exactly match the diameter of the wedge anchor bolt (e.g., a 1/2" anchor requires a 1/2" drill bit).
Tooling Matters: Only use ANSI-standard carbide-tipped masonry bits; non-standard bits create out-of-tolerance holes.
Depth Requirement: Always drill the hole at least 1/2" deeper than the intended embedment depth to accommodate dust and debris.
Cleaning is Critical: Failing to blow out concrete dust significantly reduces the anchor's holding power.
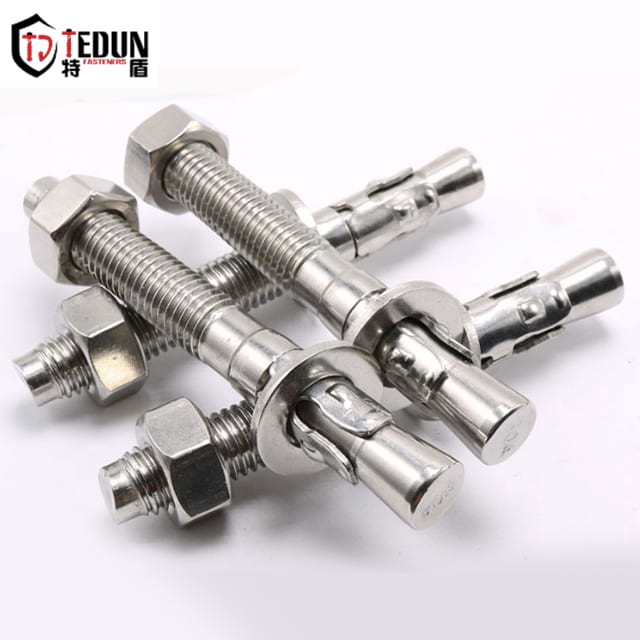
You must follow a direct 1:1 sizing correlation. The diameter of the drill bit must perfectly match the nominal diameter of the fastener. Because a concrete wedge anchor is a type of mechanical anchor bolt designed to expand against the concrete upon torquing, the hole cannot be larger. You slide the fastener directly into the hole. The threads and the expansion clip require a tight friction fit to function. If you purchase a 1/2-inch fastener, you must use a 1/2-inch drill bit. You do not need to size up or size down. This straightforward rule eliminates guesswork on the job site.
Refer to the standard sizing chart below to match your fastener with the correct tool.
Anchor Diameter | Required ANSI Drill Bit Size |
|---|---|
1/4" Anchor | 1/4" ANSI Drill Bit |
3/8" Anchor | 3/8" ANSI Drill Bit |
1/2" Anchor | 1/2" ANSI Drill Bit |
5/8" Anchor | 5/8" ANSI Drill Bit |
3/4" Anchor | 3/4" ANSI Drill Bit |
This strict 1:1 ratio differs significantly from other fastening options. Consider sleeve anchors or drop-in anchors. Sleeve anchors measure based on the outside diameter of the sleeve, not the threaded stud. Drop-in anchors often require a larger hole to accommodate the internal setting tool. People often assume all fasteners require an oversized hole for clearance. This assumption leads to incorrect drill bit selection. Always trust the 1:1 rule for this specific fastener type.
You must understand the mechanics of expansion to appreciate this precision. The fastener features a small expansion clip at its base. When you tighten the nut, the threaded body pulls upward. This upward movement forces the clip outward against the concrete walls. The clip wedges itself aggressively into the base material. It relies entirely on friction to hold the load. If the hole lacks the correct dimensions, this wedging action fails completely.
Oversized holes introduce severe danger to your structural connections. If the hole is even fractionally too large, the clip cannot catch the concrete. Worn drill bits often cause this issue. Sometimes, aggressive drilling motions create a wider opening. When the hole is too wide, the clip simply slides up the shaft. The concrete anchor bolt will spin continuously in place. You will never reach the required installation torque. The entire connection becomes worthless.
Standard drill bits are not enough for this job. You must use ANSI-compliant carbide-tipped bits. ANSI compliance ensures the carbide tip falls within incredibly strict tolerance limits. Manufacturers rely on these exact limits to guarantee performance. Organizations like ICC-ES base their certification standards on these specific tolerances. A non-compliant bit might drill a hole slightly too wide or too narrow. Always verify your bit meets the ANSI standard before drilling.
Proper hole size becomes irrelevant if the fastener lacks sufficient embedment. You must install it deep enough to support the intended load. Every diameter has a strict minimum embedment requirement. If you embed a 1/2-inch fastener too shallowly, it will pull out under stress. Deeper embedment generally yields higher pull-out values. You should consult the manufacturer data sheet to find the exact minimum depth for your chosen diameter.
Calculating the correct hole depth requires a simple but vital formula. You never drill exactly to the embedment line. You must account for debris. Use this calculation:
Determine your Desired Embedment Depth.
Add 1/2 inch to this measurement.
Drill to this new Minimum Hole Depth.
This extra half-inch acts as a collection zone. Dust and small concrete fragments will fall into this space. It prevents the wedge anchor bolt from bottoming out prematurely during installation.
You must also respect edge distance and spacing requirements. Placing fasteners too close to a concrete edge causes structural blowout. The concrete will simply spall and break away. Generally, you must keep the fastener away from the edge by at least five times its diameter. Spacing between multiple fasteners matters too. You should space them at least ten times their diameter apart. These rules prevent overlapping stress cones inside the concrete.
Finally, you must apply the correct torque values. You cannot guess the tightness. Always use a calibrated torque wrench. Over-torquing can snap the threaded stud. It can also crush the concrete around the clip. Under-torquing results in a loose connection. The clip will not expand fully. Check the manufacturer packaging for the specific foot-pounds required.
Installers often ruin holes by "reaming" them. Reaming happens when you wobble the hammer drill during operation. Some people swirl the drill to clear out dust. This creates an oval-shaped or bell-bottomed hole. The fastener requires a perfectly cylindrical channel to grip properly. An oval hole ruins the friction fit. The clip will only contact two sides of the hole instead of gripping circumferentially. You must hold the drill perfectly straight and steady.
Skipping the hole cleaning step remains a widespread failure point. Concrete dust acts as a dry lubricant. If you leave dust inside the hole, the expansion clip slides against it. This drastically reduces the pull-out strength of your concrete wedge anchor. You must perform proper cleaning. Use a wire brush to scrub the walls. Then, use compressed air or a blowout pump. Repeat this process until no dust escapes the hole.
Hitting rebar presents another major installation hazard. Structural concrete contains steel reinforcement grids. Sometimes, your drill bit strikes this solid steel. You cannot force the fastener past it. The hole becomes partially obstructed. Forcing it causes a critical safety failure. The clip will bind unevenly or break. If you hit rebar, you must usually patch the hole. You then need to drill a new hole at an approved distance away.
You must align the fastener material with its final environment. Choosing the wrong coating leads to rapid corrosion. The anchor bolt will fail long before its mechanical lifespan ends. Review these material options carefully:
Zinc-Plated: Ideal for dry, indoor applications. It offers minimal corrosion resistance.
Hot-Dipped Galvanized: Perfect for humid or exterior use. You should also use it with treated lumber applications.
304/316 Stainless Steel: Required for highly corrosive environments. Use this near coastal regions or areas with chemical exposure.
You must rigorously assess your base material. These fasteners are strictly designed for solid concrete. They do not work in brick. They fail in hollow cinder block. They cannot grip mortar joints safely. The expansion clip exerts immense outward pressure. Solid concrete can handle this pressure. Hollow or brittle materials will crack and shatter instantly. If you have brick or block, you need a different fastening solution entirely.
Always verify the technical specifications before purchasing. Do not rely on assumptions about holding power. Manufacturers provide detailed technical data sheets. These sheets list specific pull-out and shear load values. The values change based on the concrete's compressive strength, measured in PSI. A fastener performs differently in 2000 PSI concrete compared to 4000 PSI concrete. Match your project load requirements against these published tables.
Success with these heavy-duty fasteners relies entirely on precision and preparation. You must strictly follow the 1:1 drill bit matching rule to achieve a secure fit. Proper depth clearance ensures the fastener does not bottom out on debris. Furthermore, rigorous hole preparation and cleaning guarantee the expansion clip can bite into solid concrete. You should always verify your environmental conditions and calculate load requirements before purchasing bulk inventory. If you need precise documentation, please review our product catalog or contact our engineering support team for project-specific guidance.
A: You need a 1/2" ANSI-standard masonry drill bit. The hole size must exactly match the nominal diameter of the fastener to ensure proper friction and expansion.
A: No. A hammer drill is mandatory. Regular drills only spin, which quickly dulls the bit and fails to penetrate solid concrete effectively. A hammer drill uses a pulsating action to pulverize the concrete, creating the perfectly round, straight hole profile required for a secure fit.
A: No, they are permanent fixtures. Once the clip expands into the concrete, it locks securely in place. You cannot pull it out and reuse it. If you no longer need it, you must cut or grind the stud flush with the concrete surface. You cannot reuse the hole.
A: The hole must be deep enough to allow the fastener to sit flush if needed and to accommodate dust. However, it is the actual embedment depth of the expansion clip into the concrete that determines the structural load value, not the total depth of the empty hole.