


Views: 0 Author: Site Editor Publish Time: 2026-09-22 Origin: Site


Incorrect embedment depth frequently causes structural failures in heavy-duty fastening applications. Sheer load collapses often trace back to one simple mistake on the job site. Installers miscalculate how deep the anchor should go. This represents a massive safety hazard. You need clear, engineering-aligned guidelines to determine exact minimum embedment limits. Finding the proper hole depth guarantees safe installations and prevents catastrophic pull-outs. General rules provide a solid starting point for everyday construction tasks. However, manufacturer specifications and actual concrete conditions always dictate your final baseline. Specifically, ICC-ES evaluation reports hold the ultimate authority on load capacities. In this guide, you will learn the core formulas for calculating embedment depth. We will explore how different concrete conditions impact your hardware. You will also discover real-world application requirements and proven troubleshooting tips for common installation failures.
Standard Rule of Thumb: Minimum embedment is typically 4 to 4.5 times the nominal diameter of the anchor.
Hole vs. Embedment Depth: The drilled hole must be at least 1/2 inch deeper than the intended anchor embedment to accommodate concrete dust and prevent bottoming out.
Concrete Dependency: Maximum load capacity assumes fully cured (28-day), uncracked concrete with a minimum compressive strength of 2,000 PSI.
Spacing Restrictions: Anchors must be placed at least 10 anchor diameters apart and 5 anchor diameters from an unsupported edge to prevent concrete blowout.
You must understand the concept of minimum embedment depth before drilling. This term refers to the exact distance the anchor must sit below the surface of the base material. It completely excludes the thickness of the fixture you are mounting. The expansion clip needs sufficient surface area to grip the concrete walls. If you set the anchor too shallow, the clip cannot generate enough friction. This leads to immediate failure under tension.
The standard calculation is straightforward. You multiply the nominal anchor diameter by four. For example, a 1/2-inch wedge anchor bolt requires a minimum embedment of at least 2 inches. A 3/4-inch anchor demands at least 3 inches of depth. This 4x multiplier acts as the universal baseline across the construction industry.
Installers often confuse embedment depth with hole depth. They are two entirely different measurements. The drilled hole must always be deeper than the final resting depth of the anchor. This brings us to the crucial "Over-Drill" rule. You must always drill your hole 1/4 inch to 1/2 inch deeper than the total length of the anchor entering the concrete.
Failing to over-drill carries severe risks. When you drive the fastener into the hole, you push residual concrete dust downward. If you drill the hole to the exact length of the embedment, this trapped dust acts like a solid floor. The anchor bottoms out prematurely. You will attempt to torque the nut, but the anchor will not tighten against the fixture properly. The expansion clip engages too early, leaving a loose connection.
Standard Minimum Embedment and Hole Depth Chart
Anchor Diameter | Minimum Embedment (x4) | Recommended Over-Drill | Minimum Hole Depth |
|---|---|---|---|
1/4" | 1" | 1/4" | 1-1/4" |
3/8" | 1-1/2" | 1/4" | 1-3/4" |
1/2" | 2" | 1/2" | 2-1/2" |
5/8" | 2-1/2" | 1/2" | 3" |
3/4" | 3" | 1/2" | 3-1/2" |
Best Practice: Always wrap a piece of visible tape around your masonry drill bit. Set the tape at the total desired hole depth. Stop drilling the moment the tape reaches the concrete surface.
Embedment formulas only work if the concrete substrate meets specific engineering standards. The condition of your base material directly dictates how a concrete anchor bolt will perform under stress. Curing time serves as the most critical prerequisite.
Concrete must cure for a minimum of 28 days before you install any mechanical anchor bolt. Industry professionals refer to newly poured material as "green concrete." Green concrete retains significant moisture and lacks full structural rigidity. If you install an expansion anchor too early, the outward pressure will crush the soft internal walls. The moisture also acts as a lubricant against the expansion clip. This completely compromises the fastening mechanism.
You must also evaluate the compressive strength of the slab. Manufacturers base standard load capacity tables on concrete ranging from 2,000 to 4,000 PSI. If your concrete falls below 2,000 PSI, the standard 4x embedment rule no longer guarantees safety. Weak concrete requires much deeper embedment or entirely different fastening technologies.
Surface spalling presents another major challenge. Spalling occurs when the top layer of concrete chips, flakes, or crumbles during the drilling process. You cannot count crumbled top layers as part of your embedment depth. If the top 1/2 inch of the hole spalls away, your measurement must start below that damage. You must measure from the solid, undamaged concrete line downward. Otherwise, your holding power drops drastically.
Finally, modern building codes differentiate heavily between cracked and uncracked concrete. Uncracked concrete rarely exists in high-stress environments. Slabs naturally develop micro-cracks over time. Standard expansion fasteners lose friction when these cracks widen. If your project sits in a high-seismic zone, building codes require specialized seismic-rated anchors. These specific models feature uniquely designed expansion clips. They expand further if a crack opens around them during an earthquake.
Theoretical formulas provide a good baseline. However, practical applications often demand you exceed minimum embedment depths. Different environments introduce distinct load types, such as dynamic vibration or aggressive sheer forces.
Heavy Machinery & 2-Post Car Lifts: You should never rely on the bare minimum embedment for dynamic loads. Car lifts and industrial machines vibrate constantly. This vibration slowly works fasteners loose. Manufacturers usually specify extreme embedment depths to prevent catastrophic pull-out. For a typical 3/4-inch fastener on a car lift, manuals frequently demand 3-1/4 inches to 4 inches of true embedment. Exceeding minimums provides a crucial safety margin.
Safes and Security Vaults: Floor-mounting a security safe introduces unique challenges. Thieves use long pry bars to apply massive leverage against the base. A standard concrete wedge anchor requires maximum depth to resist these leverage attacks. Installers often sink these fasteners deeply and combine them with specialized heavy-duty washers. This setup makes the connection practically immune to brute-force prying.
Structural Framing (Sill Plates): Building codes tightly regulate wooden sill plates attached to foundations. The International Building Code (IBC) and International Residential Code (IRC) outline specific mandates here. They typically require 1/2-inch bolts embedded a minimum of 7 inches into the foundation. This extreme depth combats massive sheer winds and prevents the home from shifting off its base during severe weather.
Common Mistake: Installers often use the same embedment depth for static loads (like a handrail) and dynamic loads (like a generator). Dynamic loads always require deeper embedment and strict adherence to the manufacturer's technical data sheet.
Even seasoned professionals encounter problems during installation. Recognizing the root causes of these failures helps you fix them quickly. It also prevents you from compromising the structural integrity of your project.
Anchor Spinning in the Hole: This remains the most common frustration. You tap the fastener in, turn the wrench, and the whole shaft just spins. This happens for two main reasons. First, you might be using a worn-out masonry bit. A worn bit wobbles, creating a hole that is slightly oversized. Second, you might have hit a pocket of soft, older concrete. The expansion clip cannot find enough hard surface to bite into. You generally need to abandon the hole and drill a new one.
Hitting Rebar: You will inevitably hit rebar when drilling into commercial slabs. You will feel the drill suddenly stop progressing. Do not attempt to force the bit through. You must follow strict protocols for abandoning the hole. Remove the dust and fill the hole with a high-strength structural epoxy. Then, redrill your hole at an offset. Ensure you still comply with minimum spacing rules (10 diameters away from the patched hole).
Over-Torquing: Installers sometimes realize they set the hardware too shallow. To compensate, they apply extreme pressure with a torque wrench. This is incredibly dangerous. Every fastener has a specific foot-pound torque rating. Exceeding this spec will stretch the steel shaft. Worse, it can cause a concrete cone fracture. The sheer upward force pulls a massive chunk of the slab right out of the floor.
Failure to Clean the Hole: We cannot overstate this step. You must remove the dust. Leaving residual dust artificially reduces your true embedment depth. You tap the anchor bolt in, but it sits on a bed of compressed powder. You must blow out the dust using compressed air. Then, run a wire brush up and down the hole to loosen stuck particles. Finally, blow it out with compressed air one more time.
You must treat anchor selection as a risk-mitigation decision. Sometimes, the base material simply cannot support an expansion mechanism. Recognizing these problematic substrates prevents wasted time and dangerous structural failures.
Expansion fasteners rely on outward wedging force. They push aggressively against the sides of the hole. If you are working with old, crumbly, or hollow brick, this outward force is destructive. It will literally shatter weak substrates from the inside out. In these scenarios, you should recommend chemical or epoxy solutions instead. Chemical adhesives bond directly to the pores of the masonry. They cure into a solid plug without exerting any expansive pressure. This makes them ideal for vintage brickwork, soft mortar joints, or cinder blocks.
You also need alternatives for temporary or flush-mount applications. Expansion fasteners are strictly permanent. Once you pound them in and set the clip, they do not come out. If you have temporary needs, consider drop-in anchors. You tap a drop-in flush with the surface and set it with a specialized tool. It features internal threads, allowing you to bolt and unbolt fixtures as needed. When you remove the fixture, the floor remains completely flat and safe for forklift traffic.
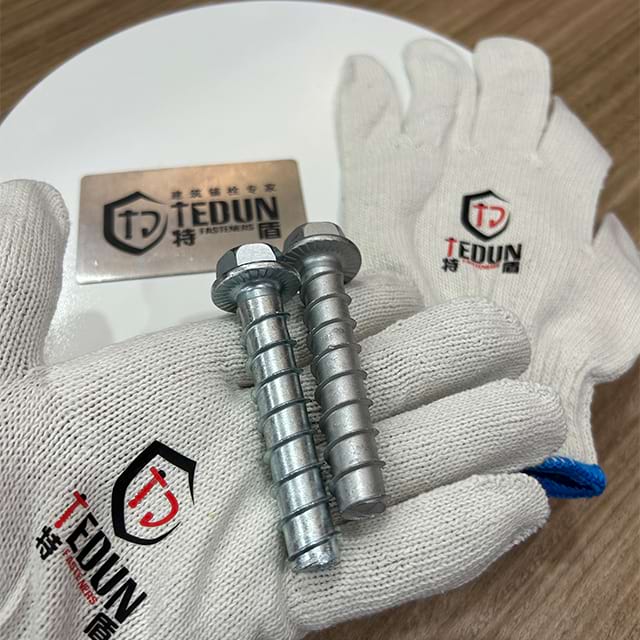
For lighter, removable loads, heavy-duty concrete screws provide excellent versatility. They cut their own threads directly into the masonry. They require no expansion clips and you can back them out easily with an impact driver. However, reserve them for medium-duty tasks. They cannot match the ultimate sheer strength of traditional expansion hardware.
Determining the correct embedment depth is never a guessing game. It is a precise calculation combining fixture thickness, fastener diameter, and overall concrete integrity. Setting your hardware too shallow drastically reduces friction, leading to imminent pull-out failure. Setting it without sufficient hole depth causes premature bottoming out and spinning hardware.
The safety and code compliance of your installation rely entirely on strict adherence to the manufacturer's technical data sheet (TDS). General rules like the 4x diameter multiplier keep you safe during standard tasks. However, heavy dynamic loads and weakened substrates require customized depth calculations. Never let assumptions override documented engineering specs.
Before purchasing hardware for critical, high-load applications, take action. Consult official load-capacity charts for your specific environment. If you are mounting industrial machinery or framing structural walls, contact a structural engineer. Getting the depth right the first time protects your property, your equipment, and the people using it.
A: Yes and no. Drilling deeper than necessary won't hurt the anchor's holding power. It actually provides extra room for dust. However, if you drill completely through a suspended slab, you compromise the concrete's structural integrity. The anchor may fall through or lose essential bottom support.
A: Generally, you must place the fastener at least 5 times the anchor diameter away from any unsupported edge. Placing it closer risks "blowout" or "spalling" when the wedge expands. The outward pressure will shatter the side of the concrete slab.
A: Usually, 3 to 5 threads should extend past the tightened nut. This confirms full engagement of the nut without wasting material or creating a tripping hazard. If fewer threads show, your embedment is likely too shallow or your fixture is too thick.
A: No, they are permanent fixtures. Once the expansion clip engages, you cannot pull it out. You must either grind the top flush with the concrete surface or use a specialized hollow core bit to drill it out entirely. After removal, you must patch the hole.