

Views: 0 Author: Site Editor Publish Time: 2026-05-01 Origin: Site


Industrial equipment misalignment and structural failures frequently stem from poorly installed or degraded anchoring points. Unstable baseplates threaten operational continuity. They also create immense site safety hazards. In recent years, engineers have recognized a clear shift in fastening strategies. Replacing traditional mechanical anchors with epoxy adhesive systems offers superior load distribution. However, this method only works safely if the installation strictly adheres to precise engineering tolerances. A flawed chemical bond is just as dangerous as a loose wedge anchor.
Our objective is to outline the verifiable standards, environmental considerations, and technical protocols you need. We will cover how to source, install, and repair an Anchor Bolt safely and permanently. You will learn the exact preparation phases required for concrete substrates. We will also detail the chemical curing guidelines that ensure structural longevity.
Depth and Clearance: Standard anchoring requires a drill depth of 4.5x the bolt diameter (9x for heavy/vibrational loads), with a strict 1/16" to 1/4" diameter clearance.
Surface Preparation: Adhesive failure is predominantly caused by residual dust; a rigid "Blow-Brush-Blow" protocol is non-negotiable for structural integrity.
Environmental Adjustments: Application variables—such as ambient temperature, horizontal/overhead orientations, and submerged conditions—dictate specific epoxy viscosities and delivery systems.
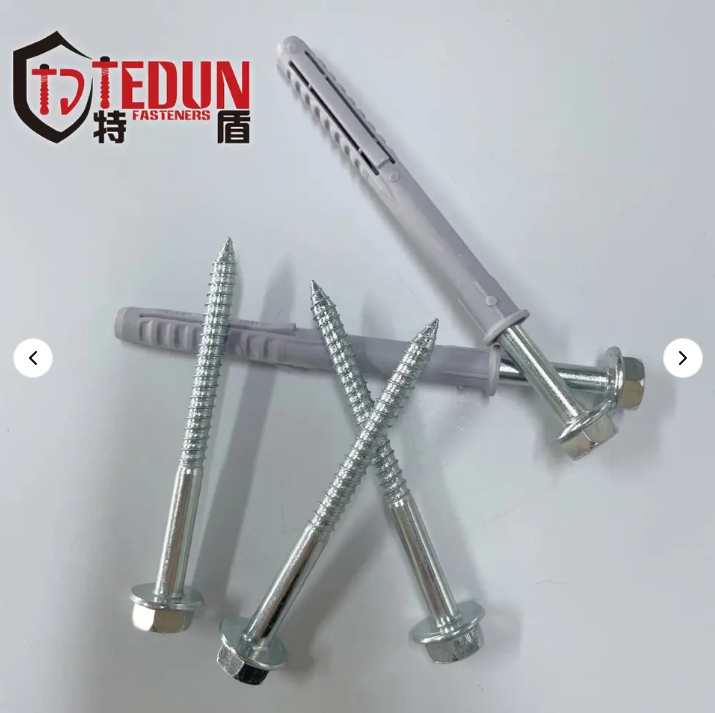
Hardware Sourcing: Partnering with a specialized Anchor Bolt manufacturer ensures hardware matches the specific chemical and tensile requirements of the epoxy resin system.
Anchor degradation happens through three primary mechanisms. Dynamic vibrational fatigue constantly shakes baseplates. Chemical corrosion eats away at exposed metal. Freeze-thaw spalling cracks the surrounding concrete. When you combine these forces, weak fastening points fail rapidly. Standard wedge anchors rely entirely on mechanical friction. They pinch the sides of the concrete hole. Under cyclic loading from heavy machinery, this friction wears down. The anchor slowly pulls out.
Epoxy systems solve this problem. They bond chemically with the concrete substrate. They fill every micro-pore inside the drilled hole. This allows them to distribute stress evenly across the entire embedded depth. They do not rely on a single friction point. Consequently, epoxy yields much higher pull-out resistance under heavy vibration.
Ignoring these mechanics creates severe safety risks. Shifting baseplates destroy motor alignments. Operational downtime skyrockets when production lines halt for emergency repairs. Furthermore, OSHA compliance rules strictly govern machinery stability. A sheared or pulled anchor often triggers regulatory inspections. Maintaining robust chemical fastening systems prevents these sudden catastrophic failures.
You must evaluate epoxy types based on specific industrial requirements. Not all resins perform identically. Some projects require rapid-cure formulas for immediate equipment restarts. Others demand high-strength, slow-curing resins for massive structural loads. You must also account for chemical resistance in manufacturing plants. Moisture tolerance matters heavily in outdoor or washdown environments.
Hardware compatibility is just as vital. You must match threaded rod or bolt grades to the environmental exposure. Galvanized steel works well for basic weather exposure. Stainless steel is mandatory for highly corrosive or submerged zones. Using mismatched metals can trigger rapid galvanic corrosion.
Consulting a reputable Anchor Bolt manufacturer during the planning phase prevents these hardware mismatches. They help you specify the exact tensile ratings required. They ensure the hardware chemically interacts safely with your chosen epoxy resin system. Viscosity matching also plays a huge role in product selection.
Epoxy Viscosity Selection Guide | ||
Epoxy Viscosity Type | Ideal Application Scenarios | Key Advantage |
|---|---|---|
Pourable Resins (Low Viscosity) | Floor joints, deep vertical holes, gravity-fed repairs. | Flows easily to fill complex micro-cracks at the bottom of a hole. |
Injectable Gels (High Viscosity) | Overhead anchorage, horizontal mounts, precise gap filling. | Resists sagging and holds the hardware firmly without dripping. |
Standard installation relies on a rigid three-step framework. You cannot skip or rush any phase. Engineering tolerances demand precision at every turn.
Engineering rules of thumb dictate specific depth metrics. A standard depth is 4.5x the bolt diameter. If you expect heavy or vibrational loads, you must drill 9x the bolt diameter. You must also respect strict diameter margins. Keep the hole diameter exactly 1/16" to 1/4" larger than the bolt. Excessive gaps cause massive epoxy shrinkage. Shrinkage reduces pull-out strength significantly.
Adhesive failure usually stems from residual dust. You must implement a rigid manual clearing protocol. We call it "Blow-Brush-Blow."
First Blow: Use oil-free compressed air. Blow out the hole from the very bottom for at least four seconds.
Severe Brushing: Use a stiff wire or nylon brush. Scrub the sides of the hole heavily. If the brush lacks friction when inserting it, discard it immediately. Worn brushes leave dust behind.
Final Blow: Use compressed air again. Purge the loosened dust completely until no debris remains.
Never inject epoxy directly into the hole without purging the cartridge first. You must squeeze out a small amount of waste material. Wait until the chemical presents a streak-free, consistent color. This proves the resin and hardener mixed perfectly.
Insert your nozzle to the absolute bottom of the hole. Inject the epoxy from the bottom up. Fill the space strictly 1/2 or 2/3 full. Overfilling creates severe waste. Underfilling creates dangerous void formations. Finally, insert the hardware. Use a slow, clockwise twisting motion as you push it down. This rotation eliminates trapped air pockets.
Standard downward installations are straightforward. Complex orientations require specialized delivery tools and modified techniques.
Gravity constantly works against overhead installations. Standard liquid epoxy will simply pour out of the hole. You must use piston plug delivery systems. These plugs fit tightly into the hole. They maintain necessary back-pressure while injecting. This prevents invisible air gaps from forming behind the fluid. You must pair them with adhesive retaining caps. These caps snap over the hole entrance. They lock the fluid safely in place while it cures.
Brick and masonry act differently than solid concrete floors. Unreinforced brick shatters easily under heavy impact. You must use "rotation-only" drilling modes. Never use a hammer drill on hollow brick.
Once you drill the hole, the hollow voids present a new problem. Epoxy will simply fall down inside the wall block. You must deploy screen tubes or mesh sleeves. You push the screen tube into the hole first. Then, you inject the epoxy directly into the screen. The mesh contains the adhesive tightly around the hardware. It prevents the chemicals from running down into hollow cavities.
Water severely compromises most chemical bonds. However, specialized water-displacing epoxy formulations exist for submerged applications. You must flush water-filled holes thoroughly first. Keep flushing them until the exiting water runs completely clear. You then inject the heavy epoxy from the very bottom. The dense chemical will physically push the water up and out of the hole. You must fill submerged holes completely to 100% volume to ensure no water remains inside.
Addressing legacy equipment poses unique challenges. Extracting an existing bolt is often structurally impossible. It can also be massively cost-prohibitive. You need a safe way to re-secure the hardware in place.
If you cannot remove the loose hardware, you must rebuild the bond around it. You achieve this through the 45-degree access method. You drill an angled channel directly into the existing bolt pocket. This creates a fresh injection pathway. You then pump a highly fluid, low-viscosity resin down this angled channel. The fluid encapsulates the old hardware. It fills the degraded gaps and restores the anchoring point.
Before executing this corrective injection, you must verify the concrete's moisture content. The substrate must remain below maximum thresholds. Typically, you want moisture levels below 6%. High moisture prevents the new resin from gripping the old concrete walls.
Positioning also matters during repairs. Loose hardware tends to lean. You must hold it perfectly straight during the chemical curing window. Utilize wooden alignment gaskets or shims. Jam them tightly around the baseplate. They hold the hardware at a true verticality until the resin hardens.
Failing to blow the dust out of the new 45-degree access hole.
Using high-viscosity gels that cannot flow around the old hardware.
Removing alignment shims before the resin reaches full cure strength.
Attempting to repair severely spalled concrete without rebuilding the surface first.
Chemical reactions depend entirely on their environment. You must actively mitigate temperature and timing risks.
Ambient conditions strictly govern cure times. Hot environments accelerate the chemical reaction rapidly. Cold environments slow it down. Temperatures below 40°F (4°C) drastically retard the curing catalyst. At these low temperatures, standard epoxies may never fully harden. If you work in freezing conditions, you must require specialized cold-weather formulas.
Contractors often confuse "gel time" with "cure time". Gel time simply means the liquid has become stiff. It cannot bear any weight yet. The severe risk lies in applying torque or structural weight before the stated full-cure timeframe. If you tighten a nut during the gel phase, you break the fragile chemical chains. This permanently destroys the anchor's pull-out strength.
Gel Time vs. Cure Time Reference Chart (Example at 70°F / 21°C) | ||
Phase | Typical Timeframe | Structural Status |
|---|---|---|
Working Time | 5 - 15 Minutes | Liquid state. Safe to adjust hardware positioning. |
Gel Time | 30 - 45 Minutes | Stiffened state. Do not touch or twist the hardware. |
Full Cure Time | 12 - 24 Hours | Fully hardened. Safe to apply maximum torque and load. |
Chemical catalysts have strict shelf lives. Utilizing expired epoxy fundamentally alters the chemical reaction. It voids all structural guarantees from the manufacturer. You must also respect storage guardrails. If you leave cartridges in freezing temperatures, the chemical components can separate. Always store materials in climate-controlled environments between 50°F and 80°F.
Proper epoxy anchor installation represents a precise chemical and mechanical process. Success relies entirely on achieving exact hole clearances. Absolute cleanliness dictates the bond's final strength. Environmental control—especially temperature and moisture management—ensures the chemical cures correctly.
As a next step, we advise engineering and maintenance teams to thoroughly audit their current fastening environments. Check for signs of vibrational loosening or chemical degradation. Consult a specialized manufacturer to guarantee your hardware is properly rated for both your specific load requirements and your chosen epoxy application. Precision upfront prevents catastrophic failures downstream.
A: Yes, by drilling an angled access hole and injecting a highly fluid epoxy resin to encapsulate the existing hardware, provided the substrate is sound.
A: Excessive gaps lead to epoxy shrinkage, poor thread engagement, and a drastic reduction in pull-out strength. Always adhere to the 1/16" to 1/4" oversized rule.
A: While gel time may occur in minutes, load-bearing cure times range from 12 to 24 hours depending strictly on ambient temperature and the manufacturer's chemical formulation.


